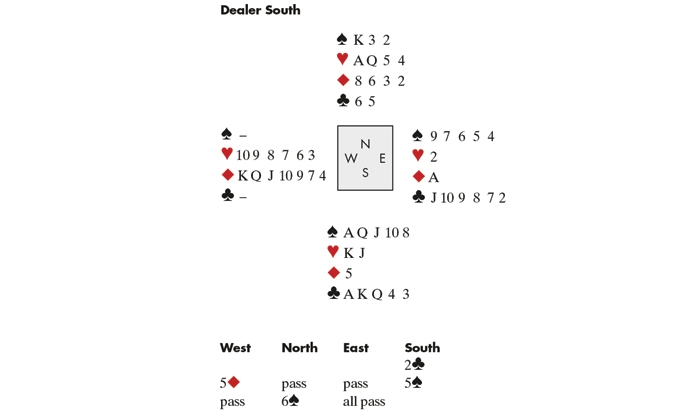
This might be the most beautiful hand I’ve ever seen. I came across it while reading one of the old bridge books in my collection (Test Your Play as Declarer by Paul Lukacs and Jeff Rubens), and was bowled over by the solution: the pure logic of it came as a sort of epiphany. Forgive me if you’ve seen the hand, or a variation of it, before — but if you haven’t, I hope you find, like I did, that your mind has entered a higher dimension. Cover up the East/West cards:
West leads the ♦K to East’s ace. East returns a trump to your ♠Q, West showing out. Assuming West started with seven diamonds, how would you proceed? Amazingly, this hand isn’t a matter of weighing up the odds. It is guaranteed, against any distribution. Here’s the first fact: it isn’t safe to start by cashing ♣A, since West’s distribution might be 7–6, but you can cash a heart, because even if West has 6 hearts, East must have 1.
So you cash the ♥K. If West shows out, you cash the ♥J, cross to dummy and discard two clubs on the ♥AQ before drawing trumps. Mind-blowing fact No 2: if West follows to a heart, it must be safe to cash a club — because West can no longer have 6 clubs. So you cash the ♣A. If West shows out (as above) you ruff a club high, finesse the ♠8 and claim. Fact No 3: if West follows to a club, he can’t have started with more than 5 hearts, which means East must follow to a second heart. So you cash the ♥J. If West shows out, you proceed as before. If West follows, then West can’t have started with more than 4 clubs, and East must have at least 2 — so you cash the ♣K, ruff a club with the ♠K, draw trumps (finessing the ♠8) — and wish everyone a happy new year.


Comments