

Choux pastry can inspire fear in even the most confident of cooks. There’s a good reason for it: it’s difficult to give a very precise recipe for choux pastry, as the amount of egg needed to create the correct texture depends on the flour you’ve used, how long the choux has rested, and how fast and how thoroughly you have cooked the choux mixture out. It’s the water content in the egg that primarily causes the choux to rise and puff in the oven into those distinctive domes or elegant eclairs: not enough and they will fall flat, but too much and the pastry will be too sloppy to pipe properly. It’s the Goldilocks of pastry recipes.
I am not unfamiliar with choux-dread. One of the first dishes I ever cooked was profiteroles, following the recipe from the First Cookery Book that I had been given for my sixth birthday. Mum and I did our best, but our choux was burnt and unpuffed, shrivelled and prune-like. I didn’t attempt choux pastry again (or much else really) for the following 20 years. When I went to pastry school, two of my three final exams were based around choux, and it took me a long time to get over my ingrained choux-anxiety.
Despite my early difficulties, profiteroles are actually a really good place to start if you’re nervous about choux: they are not the tricky-to-pipe smooth-topped sausages of eclairs – indeed, slightly craggy is how a profiterole should look, in my book – and there is none of the finger-burning caramel or structural engineering required for a croquembouche. And while they might feel a little kitsch, there’s nothing ironic about how delicious profiteroles are, or how eagerly people dive into them.
Profiteroles are actually a really good place to start if you’re nervous about choux: they are not the tricky-to-pipe smooth-topped sausages of eclairs – indeed, slightly craggy is how a profiterole should look, in my book
My aim for recipes is always to take the anxiety away from the baking process and leave you with just the enjoyable parts. And if you can remove the mystery and uncertainty from the process, you can also remove the stress. So, my three tips for reliable choux: first, when you cook out your choux on the hob before you add your eggs, make sure you cook it properly. It should sizzle gently, smell slightly nutty, come away from the sides of the pan into a cohesive dough, and it should leave a thin coating on the bottom of the pan.
Second, the pastry – and this is the most important part – is ready when it hangs off the spatula in a ‘V’ shape. Take a large blob of the pastry on the end of your spatula and drop it heavily into your ball; if you’ve added enough egg, the batter will hang in a deep ‘V’ where the rest of the dough has dropped. If it’s not hanging in a ‘V’, add a little more egg, and try again. You will likely not need all three eggs, so go slowly.
Finally, bake the choux thoroughly: this may sound obvious, but if there is residual moisture in the buns, they choux will exit the oven proudly and then swiftly collapse. Choux is ready when it feels light and hollow, and comes away easily from the baking tray (you should be able to lightly shuffle the tray and see the choux move), and the second lower-temperature stage of the baking is designed to completely dry out the buns.
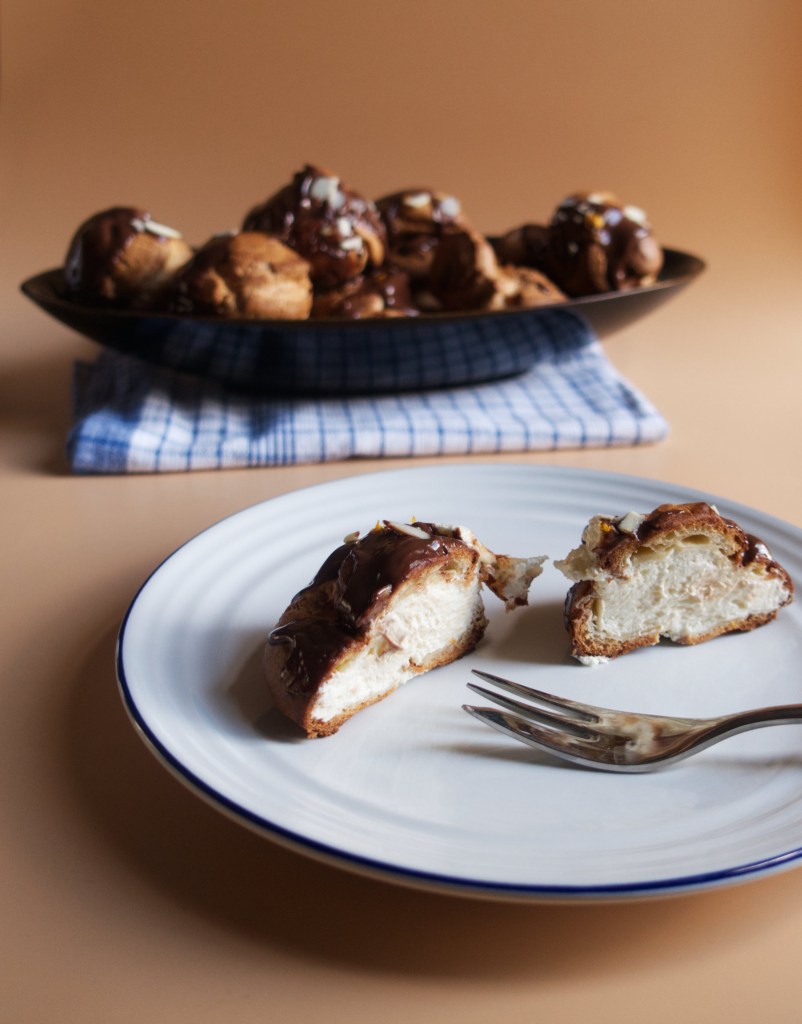
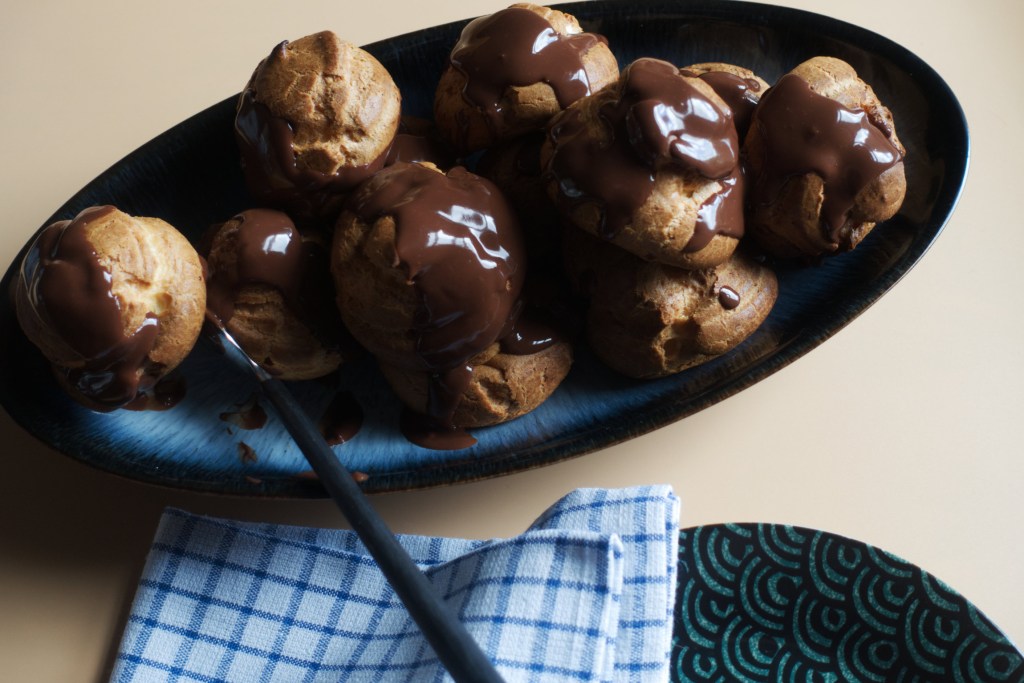
I’ve gone super traditional: simple choux, a whipped cream filling, dark chocolate sauce and a sprinkling of toasted, flaked almonds. Choux is classically filled with crème patissière, ice cream or whipped cream, but for me, it has to be a barely sweetened whipped cream, which gives the buns just the right level of squidge. My only addition is an optional one: a little orange zest whisked into the cream, and then a final sprinkling of that same zest over the top of the dish. Of course, you can portion these buns out before serving them into individual bowls, but I like them piled up pell-mell on a serving platter, tumbling down on top of each other, then dressed with the orange-scented glossy chocolate sauce.
A final note on practicalities: the choux buns can be frozen when piped or baked (but not filled) – space out the baked or unbaked choux buns on a baking tray and freeze until hard, then transfer into a freezer bag or tub. Refresh the baked choux in a hot oven until crisp, or add five minutes to the normal baking instructions of piped unbaked choux. Just make sure you don’t fill the buns too early or that perfect squidge will turn soggy. And using strong white bread flour gives the buns a firmer protein base, so is great if you have it, but if not, plain flour will work just fine.
Makes 18 buns (enough for 4)
Takes 30 minutes, plus cooling
Bakes 30 minutes
What you need
For the choux
120ml milk
50g butter
1 tablespoon sugar
½ teaspoon salt
75g strong white bread flour (plain flour is a fine substitute)
3 eggs, beaten
For the cream
250g double cream
2 tablespoons sugar
Half an orange, zested
To finish
100g double cream
100g dark chocolate
25g flaked almonds
1. For the choux, combine the milk, butter, sugar and salt in a pan, and bring to a quick boil over a medium heat. Beat the flour into the choux using a spatula, and continue to cook while beating until you can hear sizzling and the mixture comes away from the sides of the pan. Turn out on to a large dinner plate, cover with clingfilm and leave to cool for around ten minutes, until the dough is warm rather than hot.
2. Place the mixture in a bowl and add the beaten eggs in small increments, beating each addition thoroughly into the mixture. You will probably only need two of the eggs, so go slowly. When you think the choux is ready, pick up a dollop on your spatula and shake it off: if what remains on the spatula drops down in a deep ‘V’ shape, you have added enough egg; if not, add a little more and test again.
3. Heat the oven to 200°C. Spoon the choux into a piping bag fitted with a medium-sized piping nozzle and pipe small blobs – about the size of a ping-pong ball – on to an oven tray lined with greaseproof paper. Wet a finger with water and dab down any peaks on the piped blobs. If you don’t have a piping bag, you can even use two teaspoons to create the small blobs.
4. Bake for 15 minutes, then drop the oven temperature to 160°C. Bake for another ten minutes, then open the oven to release any built-up steam, and bake for a final five minutes. The choux is ready when it releases from the tray and moves around easily. Pierce the base of each bun with a slim skewer. Set to one side on a cooling rack.
5. When the choux is completely cold, and you’re ready to serve, place the cream, orange zest and sugar in a large bowl. Whisk until the cream reaches medium peak: when you lift the whisk out, the cream should support its own weight, but the very end of it will flop over. Spoon the cream into a piping bag fitted with a small, round nozzle. Holding a bun in one hand, and the piping bag in the other, place the end of the nozzle into the hole you created with a skewer and gently ease the opening of the nozzle into it: pipe the cream into the bun until it feels heavy in your hand. Repeat with all the choux buns. If you don’t have a piping bag or nozzle, carefully cut the choux buns in half using a bread knife, and spoon a generous spoonful of cream into the lower half, and place the other half on top.
6. To make the chocolate sauce, heat the cream until it is steaming, then pour it over the chopped chocolate. Leave for one minute, then whisk gently from the inside out until you have a glossy chocolate sauce. Pile the filled buns onto a large serving platter, then spoon the chocolate sauce generously over the top, before sprinkling with the flaked almonds.


Comments