Recently, a friend was browsing through the bridge books on my shelves, when suddenly she burst out laughing. ‘Here’s a funny one,’ she said. ‘It’s called Loser on Loser Play.’ Why would anyone want to read a book by a loser on how to lose? Given that she’s only recently learnt how to play – by recently, I mean two years ago, which is the blink of an eye for a bridge player – I explained that it’s a fairly common technique which involves substituting one loser for another. You might do it for a number of reasons, for instance to force a particular opponent to be on lead, or to reduce two losers to one by creating a trick. She looked ever more perplexed (it’s a surprisingly difficult concept to explain), so I gave her this example, played by Patrick Lawrence the previous week in a teams match against me.
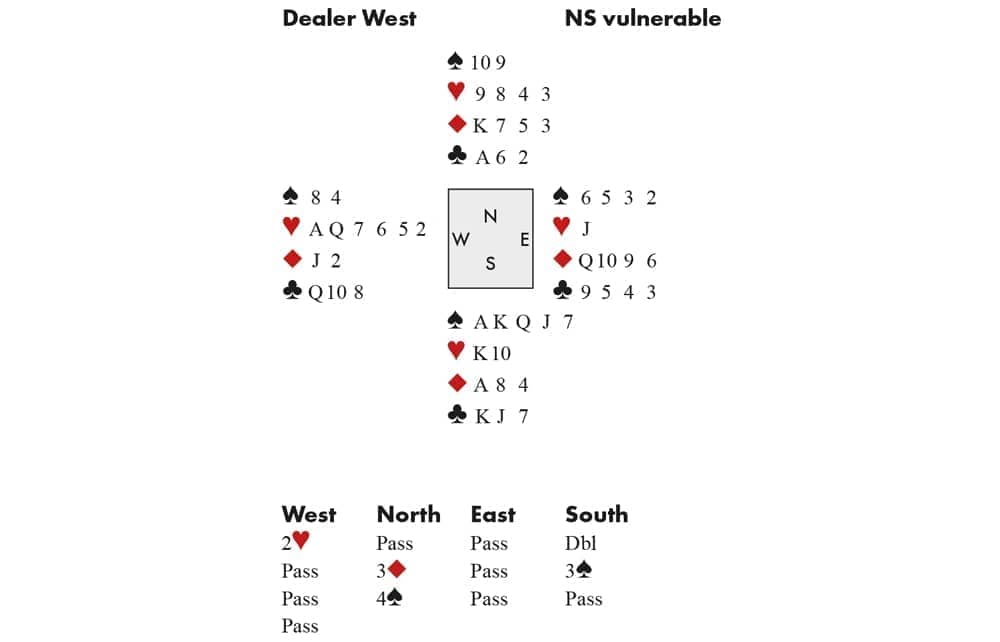
I was East. West led the ♥A, then, seeing my ♥J and declarer’s ♥10, continued with the ♥2, a suit preference signal for clubs. I ruffed (declarer playing the ♥K) and duly switched to a club. Sitting South, what would you do? You might plan to finesse the ♣J –if it wins, you only have a diamond to lose. But that would be wrong: there is a fail-safe way to make the contract via a loser-on-loser play. Patrick rose with the ♣K (it was vital to preserve the ♣A as an entry to dummy), drew trumps in three rounds, crossed to dummy’s ◆K and played the ♥9, throwing the ◆4 from hand. West won with the ♥Q and returned a diamond; Patrick won with the ◆A, crossed to dummy’s ♣A and threw his losing ♣7 on the established ♥8.


Comments